Making fire. Or, the joy of melting things, Part Two.
by Kevin
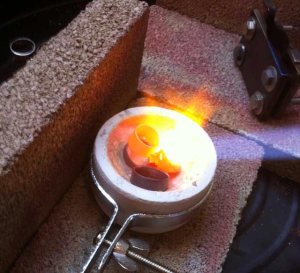
I’ve done a tiny bit of metal casting in the past – it was a relatively simple affair involving a number of old .925 sterling silver rings, a propane torch, a ceramic crucible, some firebricks and a homemade ingot mould. It was an interesting and informative exercise, one that yielded a nice 3oz ingot of sterling silver – but the process wasn’t going to be enough if I wanted to make larger ingots to make into tsuba (which was exclusively where my thinking was at the time).
My first thought was an electric melting furnace – they are compact, quiet, and more than sufficient for the required task. The downside was price – the local supplier had them on hand for around $900, and ordering one online seemed ridiculous given the cost of shipping. Plus, since I’m on a “making tools” kick, it might be more educational to make the apparatus. I ruled out a homemade electric furnace – the engineering seemed quite involved, and I couldn’t quite wrap my head around doing the calculations for the heating coil (maybe in the future I’ll revisit this). This left using either propane or coal – given that I only have a limited area to work in my downtown apartment, I opted for propane and got permission from the landlord to use a bare portion of the back yard as a foundry space.
With the decision made, I broke down my requirements thus:
1. A heat source that would be able to bring the temperature of the chosen material to “liquidus” – that is, slightly above its melting point so that it is entirely liquid.
My research yielded many simple DIY propane burner designs, all made with easy-to-find parts and varying degrees of engineering to improve efficiency. I decided on the simplest approach, and built what has become known as a “Reil burner”. This is a self-aspirating burner that makes use of gas pressure to draw oxygen into the tube for mixing with the propane – the temperatures attainable with this burner are more than sufficient for melting copper-based alloys. I was able to construct the burner with parts acquired in a single trip to Home Depot – which is good, because using propane in with fittings other than what are commercially available is tightly controlled in Canada, and you need a gas-fitter’s license to buy anything other than barbecue fittings.
With the burner built, I then needed to get an appropriate gas flow moving through it. For this I used a standard 20lb propane tank, but needed a high-pressure regulator to adjust the flow. Standard barbecue regulators only put out 1-2 PSI, I needed up to 10 PSI. Through a bit of online searching and trial-and-error, I was able to acquire a relatively inexpensive regulator, and found a pressure gauge at a local Home Hardware (handy for measuring the gas flow, obviously).
Just for fun, here’s the (shaky) burner test video I shot:
2. An enclosed space that would hold the heat around the chosen material long enough for it to go to liquidus (a furnace).
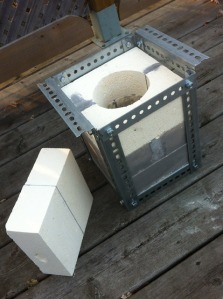
Again, there are many possibilities for this, ranging from very simple to very complex and efficient furnace designs. Since I was trying the process for the first time, I opted for one of the simplest options, that of a stack of standard insulating firebricks (the ones used to line ceramics kilns). My design simply involves two bricks mortared together for the bottom, 2 layers of two mortared bricks with a hole bored in the centre to create the chamber, and two bricks mortared together with a 2” hole bored in the centre for the lid. Another hole bored in the side acts as a tuyere for the burner. I was unsure of how the bricks would stand up to the temperatures I would be subjecting them to (they have a tendency to crack), so I assembled a tidy little frame out of slotted angle iron – the frame keeps the apparatus together and provides nifty carry handles.
3. An appropriately-sized mold in which to pour the molten metal.
Since I was using a smelting setup that I’d never used before, I opted to use a closed ingot mould instead of trying a water-casting setup. I wanted to limit the number of variables the first time around, and decided that a mould was easiest. I built it tsuba-size out of some mild steel plate with nuts and bolts to hold it together.
Next up: how it all went down!


